
Introduction to No-Bake Chocolate Bird Nests Recipe
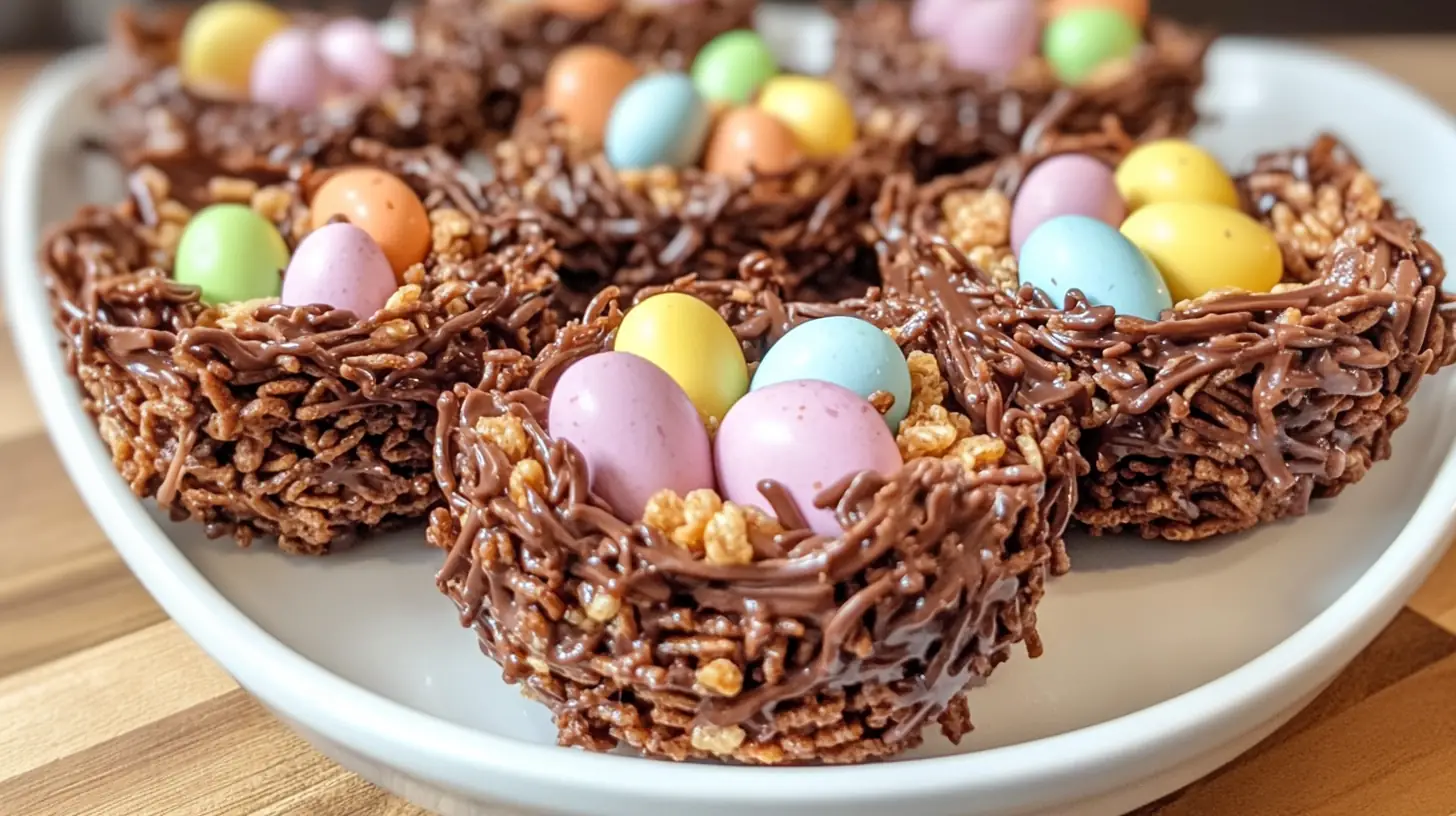
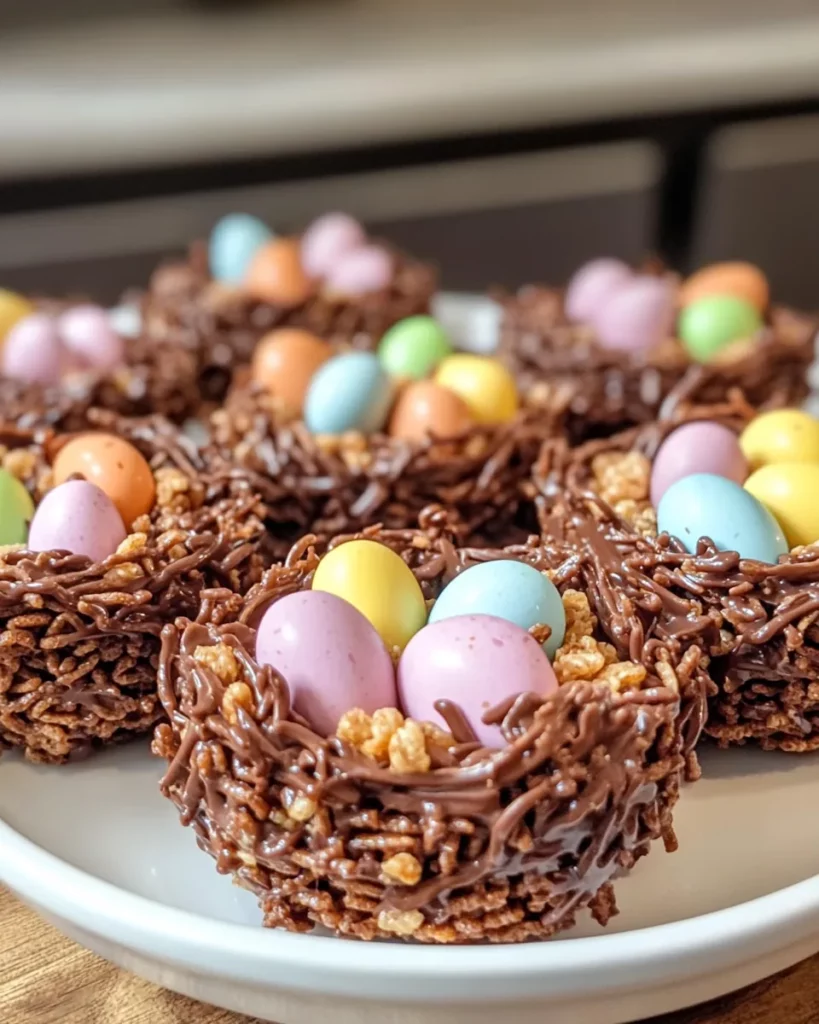
As a passionate home cook, I find joy in creating delightful treats that not only satisfy my sweet tooth but also bring smiles to the faces of my loved ones. One of my all-time favorite recipes is the No-Bake Chocolate Bird Nests. This whimsical dessert is perfect for springtime gatherings, Easter celebrations, or simply when I want to indulge in a bit of nostalgia.
Every time I make these charming little nests, I’m transported back to my childhood. I remember the excitement of crafting edible nests with my family, using simple ingredients that magically transformed into something special. The combination of crunchy cocoa Rice Krispies and creamy peanut butter, all wrapped in a blanket of melted chocolate, creates a symphony of flavors and textures that is hard to resist.
What I love most about this recipe is its simplicity. There’s no need for an oven, which means less mess and more time to enjoy the process. Plus, it’s a fantastic opportunity to get the kids involved! Watching their little hands scoop and shape the nests is a joy that warms my heart. And let’s not forget the finishing touch—those adorable Cadbury mini eggs that nestle perfectly in the center, adding a pop of color and a burst of sweetness.
So, whether you’re looking to impress guests at a spring brunch or simply want to treat yourself to a delightful snack, this No-Bake Chocolate Bird Nests Recipe is sure to be a hit. Let’s dive into the ingredients and get started on this fun culinary adventure!
Ingredients for No-Bake Chocolate Bird Nests Recipe
Before we embark on this delightful culinary journey, let’s gather our ingredients. I always believe that quality matters, especially when it comes to sweet treats. So, let’s make sure we have the best ingredients on hand for our No-Bake Chocolate Bird Nests Recipe!
Main Ingredients
- 3 cups cocoa Rice Krispies: These crunchy little gems are the backbone of our nests. They provide that satisfying crunch and a rich chocolate flavor that pairs perfectly with the other ingredients.
- 1 cup peanut butter: I prefer creamy peanut butter for this recipe, as it blends beautifully with the melted chocolate. However, if you’re a fan of chunky peanut butter, feel free to use that for an extra crunch!
- 1 cup milk chocolate chips: Choose high-quality chocolate chips for the best flavor. I often opt for semi-sweet or dark chocolate chips if I want a richer taste, but milk chocolate is a classic choice that kids adore.
- 36 Cadbury mini eggs: These colorful candies are the perfect finishing touch. They add a delightful sweetness and a pop of color that makes the nests look so inviting!
Optional Add-ons
- Shredded coconut: If you want to add a tropical twist, sprinkle some shredded coconut into the mixture. It gives a lovely texture and a hint of coconut flavor.
- Chopped nuts: For those who enjoy a bit of crunch, consider adding chopped almonds or walnuts. They complement the peanut butter beautifully.
- Mini marshmallows: These can add a fun, chewy texture to your nests. Just fold them in gently before forming the nests.
Gathering these ingredients is half the fun! I love to lay everything out on my kitchen counter, ready to create something magical. Remember, the beauty of this recipe is its flexibility. You can mix and match to suit your taste or dietary needs. Now that we have our ingredients, let’s move on to the next step and start crafting our delicious No-Bake Chocolate Bird Nests!
How to Prepare No-Bake Chocolate Bird Nests Recipe
Now that we have our ingredients ready, it’s time to roll up our sleeves and dive into the fun part—preparing our No-Bake Chocolate Bird Nests! This process is not only simple but also incredibly satisfying. I love watching the ingredients come together to create something so delightful. Let’s get started!
Step 1: Melt the Chocolate
The first step is to melt the chocolate chips. This is where the magic begins! I usually grab a microwavable-safe bowl and add my chocolate chips. Then, I pop it in the microwave.
Set your microwave to low power and melt the chocolate in 30-second intervals. After each interval, I take it out and give it a good stir. This helps the chocolate melt evenly and prevents it from burning. Trust me, burnt chocolate is a sad sight!
Tips for Melting Chocolate
- Use a glass or ceramic bowl for even heating.
- Be patient! Stirring between intervals is key to achieving that smooth, velvety texture.
- If you don’t have a microwave, you can melt the chocolate using a double boiler on the stove. Just make sure the water doesn’t touch the bowl!
Step 2: Combine Ingredients
Once the chocolate is melted and looking luscious, it’s time to combine it with the peanut butter. I find that doing this while the chocolate is still warm helps everything blend together beautifully.
So, I scoop the creamy peanut butter into the bowl with the melted chocolate and stir until it’s all mixed together. The aroma is heavenly! It’s like a warm hug for your taste buds.
Tips for Combining Ingredients
- Make sure to use a spatula or a sturdy spoon to mix. This helps incorporate everything well.
- Don’t be afraid to get in there! The more you mix, the creamier the texture will be.
- If you’re using chunky peanut butter, give it a good stir to ensure the chocolate coats all the bits evenly.
Step 3: Form the Nests
Now comes the fun part—forming the nests! I take the chocolate-peanut butter mixture and pour it over the cocoa Rice Krispies in a large bowl. Then, I gently fold the cereal into the mixture until every piece is coated. It’s like a chocolatey dance party in the bowl!
Next, I grab my greased muffin tin and start scooping the mixture into each cup. I like to use a round measuring spoon to create a little hollow in the center of each nest. This is where the Cadbury mini eggs will sit, making them look even more adorable!
Tips for Shaping Nests
- Don’t overfill the cups; leave some space for the hollow center.
- Use wet hands or a spoon to help shape the nests without sticking.
- Feel free to get creative! You can shape them into different sizes or even use silicone molds for fun shapes.
Step 4: Chill and Set
Once all the nests are formed, it’s time to let them chill. I place the muffin tin in the fridge for about 30 minutes. This helps the chocolate harden and gives the nests their shape. If I’m in a hurry, I sometimes pop them in the freezer for about 15 minutes instead.
While I wait, I can’t help but imagine how delicious they’ll be once they’re ready. The anticipation is half the fun!
Tips for Chilling
- Make sure the nests are completely set before removing them from the tin. This prevents any breakage.
- If you’re using a freezer, keep an eye on them to avoid freezing too hard.
- Once set, gently twist the muffin tin to release the nests. They should pop out easily!
And there you have it! The steps to create your very own No-Bake Chocolate Bird Nests are complete. I can already taste the sweet, crunchy goodness. Let’s move on to the next section where we’ll talk about the equipment needed for this delightful recipe!
Equipment Needed for No-Bake Chocolate Bird Nests Recipe
Before we dive into the kitchen, let’s gather the essential tools for our No-Bake Chocolate Bird Nests Recipe. Having the right equipment makes the process smoother and more enjoyable. I always find that being prepared helps me focus on the fun of cooking rather than scrambling for tools. Here’s what you’ll need:
- Microwave-safe bowl: This is crucial for melting the chocolate. If you don’t have one, a heatproof glass or ceramic bowl works just as well. Just make sure it can handle the heat!
- Spatula or sturdy spoon: I love using a spatula for mixing the chocolate and peanut butter. It helps scrape every last bit from the bowl, ensuring nothing goes to waste!
- Large mixing bowl: You’ll need this to combine the cocoa Rice Krispies with the chocolate mixture. A big bowl allows for easy mixing without making a mess.
- 12-count muffin tin: This is where the magic happens! If you don’t have a muffin tin, silicone molds or even a baking dish can work. Just remember to adjust the size of your nests accordingly.
- Measuring cups and spoons: Accurate measurements are key to achieving the perfect balance of flavors. I always keep my measuring tools handy to ensure I get it just right.
- Butter or cooking spray: This is essential for greasing the muffin tin. If you prefer a healthier option, you can use coconut oil or even a silicone muffin tin that doesn’t require greasing.
- Refrigerator or freezer: You’ll need this to chill the nests until they set. If you’re in a hurry, the freezer is your best friend!
Gathering these tools is like assembling a team for a fun adventure in the kitchen. Each piece plays a vital role in creating our delightful No-Bake Chocolate Bird Nests. Once you have everything ready, you’ll be all set to whip up this sweet treat. Let’s keep the momentum going and explore some variations of this recipe next!
Variations of No-Bake Chocolate Bird Nests Recipe
As I continue my culinary journey, I’ve discovered that one of the most delightful aspects of cooking is the ability to customize recipes to suit my taste or the occasion. The No-Bake Chocolate Bird Nests Recipe is no exception! With just a few tweaks, you can create a variety of delicious versions that will keep your family and friends guessing. Let me share some of my favorite variations that I’ve tried over the years.
Different Types of Chocolate
While milk chocolate is a classic choice, I love experimenting with different types of chocolate to create unique flavors. For instance, using dark chocolate gives the nests a rich, slightly bitter taste that pairs beautifully with the sweetness of the peanut butter. If you’re feeling adventurous, try white chocolate for a creamy, sweet twist. The contrast of colors with the Cadbury mini eggs on top is simply stunning!
Nut Butters Galore
If you’re a fan of nutty flavors, consider swapping out peanut butter for other nut butters. Almond butter adds a lovely, slightly sweet flavor, while cashew butter brings a creamy texture that’s hard to resist. For those with nut allergies, sunflower seed butter is a fantastic alternative that still provides that creamy goodness without the nuts.
Mixing in Add-Ins
One of the best parts about this recipe is how versatile it is when it comes to add-ins. I often toss in a handful of mini marshmallows for a chewy surprise or sprinkle in some shredded coconut for a tropical flair. You can also add dried fruits like cranberries or raisins for a touch of tartness. The possibilities are endless!
Going Gluten-Free
If you or someone you know is gluten-sensitive, you can easily make this recipe gluten-free by using gluten-free cocoa Rice Krispies. It’s a simple swap that ensures everyone can enjoy these delightful nests without worry. Just be sure to check the labels on your chocolate chips and peanut butter to confirm they’re gluten-free as well.
Decorative Touches
To make your No-Bake Chocolate Bird Nests even more festive, consider adding decorative touches. Drizzling melted chocolate over the nests before adding the mini eggs creates a beautiful presentation. You can also sprinkle colorful sprinkles or edible glitter on top for a fun, festive look. These little details can turn a simple treat into a showstopper!
As I explore these variations, I find that each one brings its own charm and flavor to the table. Whether you stick to the classic recipe or venture into new territory, the joy of creating and sharing these No-Bake Chocolate Bird Nests is what truly matters. So, gather your ingredients and let your creativity soar as you whip up your own delightful versions of this beloved treat!
Cooking Notes for No-Bake Chocolate Bird Nests Recipe
As I’ve whipped up my fair share of No-Bake Chocolate Bird Nests, I’ve learned a few valuable lessons along the way. These cooking notes are like little nuggets of wisdom that can help you avoid common pitfalls and enhance your experience in the kitchen. Let’s dive into some insights that I hope will make your journey smoother and more enjoyable!
Watch the Chocolate
One of the most common mistakes I’ve made is overheating the chocolate. It can go from perfectly melted to burnt in a flash! Always melt it in short intervals and stir frequently. If you notice any lumps, don’t panic! Just keep stirring, and the heat will help them melt away. Remember, patience is key!
Peanut Butter Consistency
The type of peanut butter you use can significantly affect the texture of your nests. If you opt for natural peanut butter, which can be a bit runny, you might need to adjust the amount slightly. I’ve found that adding a touch more cocoa Rice Krispies can help balance things out. On the other hand, if you’re using a thicker peanut butter, you may need to mix a bit longer to ensure everything is well combined.
Chilling Time Matters
Chilling the nests is crucial for achieving that perfect shape. If you’re in a hurry, I totally understand the temptation to skip this step. However, I’ve learned the hard way that rushing can lead to nests that crumble apart. So, give them the time they need to set properly. If you’re using the freezer, keep an eye on them to avoid freezing too hard!
Experiment with Ratios
Don’t be afraid to play around with the ratios of chocolate, peanut butter, and Rice Krispies. If you prefer a richer chocolate flavor, add a bit more chocolate. If you want a crunchier texture, increase the Rice Krispies. This recipe is forgiving, and adjusting the ingredients to suit your taste is part of the fun!
Storage Tips
Once your nests are ready, you might be wondering how to store them. I recommend keeping them in an airtight container in the fridge. This helps maintain their shape and keeps them fresh. If you’re making them ahead of time, they can last for about a week—if they last that long! Just be sure to separate layers with parchment paper to prevent sticking.
Involve the Kids
One of the best parts of making these nests is getting the kids involved. However, I’ve learned to keep a close eye on them when melting chocolate or using sharp utensils. It’s a great opportunity to teach them about kitchen safety while having fun together. Plus, their excitement adds an extra sprinkle of joy to the process!
These cooking notes are like little breadcrumbs leading you to a successful baking adventure. With these insights in your back pocket, you’ll be well-equipped to create your own delightful No-Bake Chocolate Bird Nests. So, let’s keep the momentum going and explore some serving suggestions next!
Serving Suggestions for No-Bake Chocolate Bird Nests Recipe
Now that we’ve crafted our delightful No-Bake Chocolate Bird Nests, it’s time to think about how to present them! Presentation can elevate any dish, and these charming nests are no exception. I love to get creative when it comes to serving, and I’m excited to share some of my favorite ideas with you!
Festive Platter
One of my go-to ways to serve these nests is on a beautiful platter. I like to arrange them in a circle, creating a whimsical nest-like display. You can even add some fresh flowers or greenery around the edges for a pop of color. This makes for a stunning centerpiece at any gathering, especially during springtime or Easter celebrations!
Individual Treat Bags
If you’re planning a party or a special event, consider packaging the nests in individual treat bags. I love using clear cellophane bags tied with colorful ribbons. This not only makes for a cute presentation but also allows guests to take home a sweet treat. It’s a lovely way to share the joy of these nests with others!
Pairing with Beverages
When it comes to pairing, I find that these chocolatey nests go wonderfully with a variety of beverages. A glass of cold milk is a classic choice, but I also enjoy serving them with a warm cup of coffee or hot chocolate. The rich flavors complement each other beautifully, creating a cozy experience. For a fun twist, try pairing them with a fruity iced tea or lemonade for a refreshing contrast!
Occasions for Serving
These No-Bake Chocolate Bird Nests are perfect for a multitude of occasions. I often whip them up for family gatherings, birthday parties, or even as a sweet surprise for my kids after school. They’re also a hit at potlucks and bake sales, where their unique appearance draws people in. Plus, they’re a fantastic treat for Easter brunch or spring picnics, adding a touch of whimsy to any table!
Creative Toppings
To make your nests even more enticing, consider adding some creative toppings. A drizzle of melted chocolate or a sprinkle of colorful sprinkles can add an extra layer of fun. You could also place edible flowers on top for a beautiful, garden-inspired look. These little touches can make your nests stand out and impress your guests!
As I serve these delightful treats, I can’t help but feel a sense of joy and satisfaction. The smiles on my loved ones’ faces as they take their first bite are truly priceless. So, whether you’re hosting a gathering or simply enjoying a quiet afternoon at home, these serving suggestions will help you present your No-Bake Chocolate Bird Nests in a way that’s sure to delight. Let’s keep the excitement going and explore some tips for perfecting this recipe next!
Tips for Perfect No-Bake Chocolate Bird Nests Recipe
As I’ve journeyed through the delightful world of making No-Bake Chocolate Bird Nests, I’ve gathered a treasure trove of tips that can help you achieve the best results. These little nuggets of wisdom are like secret ingredients that can elevate your nests from good to absolutely fantastic. Let’s dive into some expert tips that I’ve learned along the way!
Choose Quality Ingredients
First and foremost, the quality of your ingredients can make a world of difference. I always opt for high-quality chocolate chips and natural peanut butter. The richer the ingredients, the more delicious your nests will be. It’s like using a fine paintbrush to create a masterpiece—every detail counts!
Measure Accurately
When it comes to baking, precision is key. I recommend using measuring cups and spoons to ensure you get the right amounts of each ingredient. This helps maintain the perfect balance of flavors and textures. A little too much peanut butter or chocolate can change the outcome, so take your time with this step!
Mix Gently but Thoroughly
As you combine the chocolate and peanut butter with the Rice Krispies, be gentle yet thorough. I like to fold the ingredients together rather than stirring vigorously. This helps keep the cereal crispy while ensuring every piece is coated in that luscious chocolate mixture. Think of it as a gentle hug for your ingredients!
Don’t Rush the Chilling Process
Patience is a virtue, especially when it comes to chilling your nests. I’ve learned that allowing them to set properly in the fridge or freezer is crucial for achieving that perfect shape. If you’re in a hurry, resist the temptation to skip this step. Trust me, the wait is worth it!
Experiment with Nest Sizes
Feel free to get creative with the size of your nests! I often make a mix of mini and regular-sized nests. This not only adds variety but also makes for a fun presentation. Plus, smaller nests are perfect for little hands, while larger ones can be a delightful treat for adults. It’s all about having fun in the kitchen!
Store Properly
Once your nests are ready, proper storage is essential to keep them fresh. I recommend placing them in an airtight container in the fridge. This helps maintain their shape and prevents them from becoming too soft. If you’re making them ahead of time, they can last for about a week—if they last that long!
Get Creative with Decorations
Don’t shy away from adding your personal touch! I love to drizzle melted chocolate over the nests or sprinkle them with colorful edible glitter. These little decorations can turn a simple treat into a showstopper. Plus, it’s a great way to get the kids involved in the decorating process!
With these tips in your back pocket, you’ll be well on your way to creating the most delightful No-Bake Chocolate Bird Nests. Remember, cooking is all about enjoying the process and sharing the joy with others. So, roll up your sleeves, have fun, and let your creativity shine as you whip up these charming treats!
Breakdown of Time for No-Bake Chocolate Bird Nests Recipe
As a passionate home cook, I know that time management is key when whipping up delicious treats. The No-Bake Chocolate Bird Nests Recipe is not only fun to make, but it also comes together quite quickly! Here’s a handy breakdown of the time you’ll need to create these delightful nests, so you can plan your kitchen adventure accordingly.
Prep Time
Getting everything ready is part of the excitement! For this recipe, I usually spend about 15 minutes gathering my ingredients and equipment. This includes measuring out the cocoa Rice Krispies, peanut butter, and chocolate chips, as well as greasing the muffin tin. I find that laying everything out on my counter makes the process smoother and more enjoyable.
Cooking Time
Now, let’s talk about the actual cooking time. The melting of the chocolate and combining of ingredients takes around 10 minutes. This includes melting the chocolate in the microwave, mixing it with peanut butter, and coating the Rice Krispies. It’s a quick and satisfying process that fills the kitchen with a delightful aroma!
Chilling Time
Once the nests are formed, they need some time to chill and set. I typically let them sit in the fridge for about 30 minutes. If I’m in a hurry, I might pop them in the freezer for about 15 minutes instead. This step is crucial for ensuring that the nests hold their shape and are ready to be enjoyed!
Total Time
When you add it all up, the total time for making these No-Bake Chocolate Bird Nests is approximately 55 minutes if you include the chilling time in the fridge. If you opt for the freezer method, you can cut that down to around 40 minutes. Either way, you’ll have a delightful treat ready to impress your family and friends in no time!
With this time breakdown, you can easily fit this fun recipe into your day. Whether you’re making them for a special occasion or just because, the joy of creating these No-Bake Chocolate Bird Nests is well worth the time spent in the kitchen. Now, let’s move on to the nutritional information for this delightful treat!
Nutritional Information for No-Bake Chocolate Bird Nests Recipe
As a passionate home cook, I believe it’s important to know what goes into the treats we create. While the No-Bake Chocolate Bird Nests are undeniably delicious, they also come with their own nutritional profile. Understanding the nutritional information can help you enjoy these delightful nests in moderation. Here’s a breakdown of the key nutritional components per serving, assuming the recipe yields 12 nests:
Calories
Each No-Bake Chocolate Bird Nest contains approximately 150 calories. This makes them a sweet treat that can be enjoyed without too much guilt, especially when shared with friends and family!
Fats
These nests are rich in flavor, thanks to the peanut butter and chocolate. Each nest has about 8 grams of fat, with around 2 grams of saturated fat. While fats are essential for our bodies, it’s always good to keep an eye on the amount we consume.
Carbohydrates
With the cocoa Rice Krispies and chocolate chips, each nest contains roughly 18 grams of carbohydrates. This includes about 8 grams of sugar, which comes from the chocolate and the Cadbury mini eggs. The sweetness is what makes these nests so irresistible!
Protein
Thanks to the peanut butter, each nest provides about 3 grams of protein. This is a nice boost, especially for a sweet treat, making it a bit more satisfying.
Fiber
While these nests are not a significant source of fiber, they do contain about 1 gram of dietary fiber per serving. It’s always a good idea to balance sweet treats with fiber-rich foods in your diet!
Vitamins and Minerals
These nests also offer some vitamins and minerals, primarily from the peanut butter. You’ll find small amounts of magnesium, potassium, and vitamin E, which are beneficial for overall health. However, they should not be relied upon as a primary source of nutrients.
As I enjoy these delightful No-Bake Chocolate Bird Nests, I remind myself that moderation is key. They’re perfect for special occasions or as an occasional treat. Knowing the nutritional information helps me appreciate the flavors while being mindful of my choices. So, gather your ingredients, whip up a batch, and enjoy these charming nests with family and friends, all while keeping a balanced approach to your diet!
Frequently Asked Questions about No-Bake Chocolate Bird Nests Recipe
As I’ve shared my No-Bake Chocolate Bird Nests Recipe with friends and family, I’ve encountered a few common questions that pop up time and again. It’s always great to clarify any concerns and help fellow home cooks feel confident in their culinary adventures. Here are some frequently asked questions that I hope will guide you as you create your own delightful nests!
Can I use different types of cereal?
Absolutely! While cocoa Rice Krispies are a classic choice, you can experiment with other cereals as well. I’ve tried using cornflakes for a lighter texture, and they turned out delicious! Just keep in mind that the flavor and crunch may vary, so choose a cereal that you enjoy.
What if I don’t have a muffin tin?
No worries! If you don’t have a muffin tin, you can use silicone molds or even shape the nests by hand on a parchment-lined baking sheet. Just make sure to create a little hollow in the center for the Cadbury mini eggs. The nests may not be as uniform, but they’ll still be just as tasty!
How long do the nests last?
These delightful nests can last about a week when stored in an airtight container in the fridge. However, I find they’re usually devoured long before that! If you want to keep them fresh, just make sure to separate layers with parchment paper to prevent sticking.
Can I make these nests ahead of time?
Definitely! I often make them a day or two in advance, especially for parties or gatherings. Just be sure to store them properly in the fridge. They’re a great make-ahead treat that allows you to enjoy more time with your guests!
Can I substitute the peanut butter for something else?
Yes! If you have nut allergies or simply prefer a different flavor, you can substitute peanut butter with almond butter, cashew butter, or sunflower seed butter. Each option brings its own unique taste and texture, so feel free to experiment!
What if my chocolate hardens too quickly?
If you find that your chocolate is hardening before you can mix it with the peanut butter, try warming it slightly in the microwave for a few seconds. Just be careful not to overheat it! Alternatively, you can melt the chocolate in a double boiler for more control over the temperature.
Can I add more ingredients to the mixture?
Absolutely! This recipe is very forgiving and allows for creativity. You can add mini marshmallows, dried fruits, or even a sprinkle of sea salt for a sweet and salty twist. Just remember to adjust the ratios slightly to maintain the right consistency.
These frequently asked questions are a great way to address any concerns you might have while making your No-Bake Chocolate Bird Nests. Cooking should be a joyful experience, and I hope these answers help you feel more confident as you embark on this delicious adventure. Now, let’s wrap things up with a conclusion that highlights the charm of this delightful recipe!
Conclusion on No-Bake Chocolate Bird Nests Recipe
As I reflect on my journey of creating No-Bake Chocolate Bird Nests, I can’t help but feel a sense of joy and satisfaction. This delightful recipe is not just about the sweet, crunchy treats; it’s about the memories made and the smiles shared around the table. The simplicity of the ingredients and the ease of preparation make it a perfect choice for both novice cooks and seasoned chefs alike.
What truly sets this recipe apart is its versatility. Whether you’re celebrating a holiday, hosting a gathering, or simply indulging in a sweet craving, these nests can be customized to fit any occasion. From experimenting with different types of chocolate to adding fun mix-ins, the possibilities are endless. Each batch can be a unique creation, reflecting your personal touch and creativity.
Moreover, the No-Bake Chocolate Bird Nests are a fantastic way to involve family and friends in the kitchen. I cherish the moments spent with loved ones, scooping, shaping, and decorating these charming nests together. It’s a wonderful opportunity to bond, share stories, and create lasting memories—all while enjoying the delicious results of our efforts.
In a world where we often rush through our days, this recipe invites us to slow down and savor the process. The anticipation of waiting for the nests to chill, the excitement of adding the colorful Cadbury mini eggs, and the joy of sharing them with others are all part of the experience. It’s a reminder that cooking is not just about the end product; it’s about the journey and the connections we make along the way.
So, whether you’re making these No-Bake Chocolate Bird Nests for a special occasion or just because, I encourage you to embrace the fun and creativity that comes with it. Gather your ingredients, invite your loved ones into the kitchen, and let the magic unfold. I promise that the smiles and laughter that follow will be the sweetest reward of all!
Print
No-Bake Chocolate Bird Nests Recipe: A Sweet Delight!
- Total Time: 55 minutes
- Yield: 12 nests 1x
- Diet: Vegetarian
Description
A delightful and whimsical dessert made with cocoa Rice Krispies, creamy peanut butter, and melted chocolate, topped with colorful Cadbury mini eggs.
Ingredients
- 3 cups cocoa Rice Krispies
- 1 cup creamy peanut butter
- 1 cup milk chocolate chips
- 36 Cadbury mini eggs
- Optional: Shredded coconut, chopped nuts, mini marshmallows
Instructions
- Melt the chocolate chips in a microwave-safe bowl in 30-second intervals, stirring in between.
- Combine the melted chocolate with the peanut butter until smooth.
- Pour the chocolate-peanut butter mixture over the cocoa Rice Krispies and fold until coated.
- Scoop the mixture into a greased muffin tin, creating a hollow center for the mini eggs.
- Chill in the fridge for about 30 minutes or in the freezer for 15 minutes until set.
Notes
- Use high-quality chocolate for the best flavor.
- Experiment with different types of nut butters.
- Store in an airtight container in the fridge for up to a week.
- Involve kids in the process for a fun family activity.
- Prep Time: 15 minutes
- Cook Time: 10 minutes
- Category: Dessert
- Method: No-Bake
- Cuisine: American
Nutrition
- Serving Size: 1 nest
- Calories: 150
- Sugar: 8 grams
- Fat: 8 grams
- Saturated Fat: 2 grams
- Carbohydrates: 18 grams
- Fiber: 1 gram
- Protein: 3 grams
Keywords: No-Bake, Chocolate, Bird Nests, Dessert, Easter, Treats