

No-Bake Caramel Pretzel Crack Bars are the ultimate sweet-and-salty treat that’s sure to impress anyone who loves easy-to-make desserts with bold flavors. These bars are a delightful combination of crispy pretzels, gooey caramel, and rich chocolate, all without needing to turn on your oven. The beauty of this recipe lies in its simplicity—only a few ingredients are required, and the result is an irresistibly addictive snack. The crunchy pretzels create a perfect base, while the caramel layer adds a buttery sweetness that pairs perfectly with the slightly salty pretzels. Topped with smooth, melted chocolate, these bars come together quickly and are great for any occasion, whether it’s a family gathering, a potluck, or just a craving for something sweet. Best of all, they require no baking, making them the perfect go-to dessert for hot summer days or when you’re short on time.
Ingredients
- 3 cups mini pretzels (or regular pretzels broken into smaller pieces)
- 1 cup unsalted butter
- 1 cup packed brown sugar
- 1 teaspoon vanilla extract
- 2 cups semisweet chocolate chips
- 1/2 cup chopped nuts (optional, such as pecans or almonds)
Preparation
Step 1: Prepare the pretzels
Start by lining a 9×13-inch baking pan with parchment paper or aluminum foil to prevent sticking. Break the pretzels into pieces, or use mini pretzels if you prefer a uniform texture. Spread the pretzel pieces evenly across the bottom of the prepared pan. You want to ensure that the entire base is covered with pretzels.
Step 2: Make the caramel sauce
In a medium saucepan, melt the unsalted butter over medium heat. Once the butter is melted, add the brown sugar and stir constantly until the mixture comes to a gentle boil. Keep stirring for 2-3 minutes, allowing the sugar to dissolve completely. Once the mixture starts bubbling, lower the heat and let it simmer for another 2-3 minutes, stirring frequently. Remove the pan from heat and stir in the vanilla extract for added flavor.
Step 3: Pour the caramel over the pretzels
Carefully pour the caramel sauce over the pretzel pieces in the baking pan. Make sure the caramel is evenly distributed, gently tapping the pan on the counter to help the caramel settle into all the nooks and crannies of the pretzels. Allow the caramel to cool for a few minutes to set slightly before proceeding.
Step 4: Melt the chocolate
In a separate microwave-safe bowl, melt the semisweet chocolate chips in 30-second intervals, stirring after each interval until smooth and completely melted. Alternatively, you can melt the chocolate using a double boiler on the stovetop. If you prefer a thinner consistency for the chocolate, you can add a teaspoon of vegetable oil or shortening to make it more pourable.
Step 5: Top the bars with chocolate
Once the caramel has set slightly, pour the melted chocolate over the caramel and pretzel layer. Spread the chocolate evenly using a spatula to cover the entire surface. If you like, sprinkle chopped nuts such as pecans, almonds, or walnuts on top for an extra crunch and flavor boost.
Step 6: Chill the bars
Refrigerate the bars for at least 2 hours or until the chocolate is completely set and hardened. The longer they chill, the firmer and more cohesive the bars will be. Once the bars are fully set, remove them from the refrigerator and cut them into squares or rectangles.
Variation
Peanut Butter Version: Add a layer of peanut butter between the pretzels and caramel for a creamy, nutty twist.
Milk Chocolate Version: Use milk chocolate instead of semisweet for a sweeter, creamier bar.
Nut-Free Version: Omit the nuts if you prefer a nut-free treat or if you’re making these for people with nut allergies.
Sea Salt Version: Sprinkle flaky sea salt over the chocolate layer for a sweet-and-salty combination that enhances the flavor.
Cooking Notes
For a smoother texture, make sure to stir the caramel sauce continuously to prevent it from burning. If the chocolate doesn’t spread easily, you can heat it for a few extra seconds in the microwave or add a small amount of oil to make it more spreadable. It’s important to allow the caramel to set slightly before adding the chocolate, as it will prevent the chocolate from mixing into the caramel layer. If you’re short on time, you can freeze the bars for about 30 minutes to set the chocolate more quickly.
Serving Suggestions
These bars are a fantastic treat for any occasion. Serve them as an indulgent dessert after dinner or as a snack at your next party. They also make great gifts when packaged in a cute tin or wrapped in cellophane. For an extra touch, drizzle some additional caramel or melted chocolate over the top before serving for a decadent presentation.
Tips
To make the cutting process easier, use a sharp knife to slice the bars while they’re cold. For a clean cut, dip the knife in warm water and wipe it dry before slicing. You can store these bars in an airtight container at room temperature for up to 5 days, or keep them in the refrigerator for up to 1 week. If you want to make these bars ahead of time, they can be stored in the freezer for up to 2 months. Just let them thaw at room temperature before serving.
Prep Time:
10 minutes
Cooling Time:
2 hours
Total Time:
2 hours 10 minutes
Nutritional Information (per serving):
- Calories: 210
- Protein: 2g
- Sodium: 100mg
- Fat: 14g
- Carbohydrates: 22g
FAQs
Q: Can I use salted pretzels instead of unsalted ones?
Yes, you can use salted pretzels, but keep in mind that it will increase the overall saltiness of the bars. If you prefer a less salty treat, stick to unsalted pretzels or rinse the salted pretzels lightly before using.
Q: Can I use a different type of chocolate?
Absolutely! You can use milk chocolate, white chocolate, or dark chocolate depending on your taste preferences. Just remember that different types of chocolate will alter the flavor profile of the bars.
Q: How can I prevent the chocolate from cracking when cutting the bars?
To prevent the chocolate from cracking, make sure it is fully melted and spread evenly. Also, let the bars cool completely before cutting, as cutting them while they are still warm can cause the chocolate to break.
Q: Can I make these bars ahead of time?
Yes, these bars can be made in advance and stored for up to 1 week in an airtight container. They also freeze well for up to 2 months.
Q: How can I make these bars more festive for the holidays?
For a holiday touch, try adding sprinkles, mini marshmallows, or crushed peppermint on top of the chocolate layer. You can also drizzle white or colored chocolate for a decorative effect.
Conclusion
No-Bake Caramel Pretzel Crack Bars are an irresistible treat that brings together the perfect balance of salty and sweet. With their crispy pretzel base, rich caramel layer, and decadent chocolate topping, these bars are sure to be a crowd-pleaser at any event. Whether you’re making them for a party, a family gathering, or just for yourself, these bars are quick, easy, and incredibly delicious. The no-bake aspect makes them even more appealing, especially when you’re looking for a fast and simple dessert that still packs a punch. With endless variations to try and simple ingredients you likely already have in your pantry, these bars will quickly become one of your go-to recipes. Make a batch today and enjoy the delightful crunch and sweetness in every bite!
Print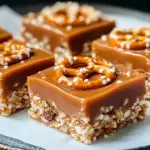
No-Bake Caramel Pretzel Crack Bars
Ingredients
- 3 cups mini pretzels (or regular pretzels broken into smaller pieces)
- 1 cup unsalted butter
- 1 cup packed brown sugar
- 1 teaspoon vanilla extract
- 2 cups semisweet chocolate chips
- 1/2 cup chopped nuts (optional, such as pecans or almonds)
Instructions
Step 1: Prepare the pretzels
Start by lining a 9×13-inch baking pan with parchment paper or aluminum foil to prevent sticking. Break the pretzels into pieces, or use mini pretzels if you prefer a uniform texture. Spread the pretzel pieces evenly across the bottom of the prepared pan. You want to ensure that the entire base is covered with pretzels.
Step 2: Make the caramel sauce
In a medium saucepan, melt the unsalted butter over medium heat. Once the butter is melted, add the brown sugar and stir constantly until the mixture comes to a gentle boil. Keep stirring for 2-3 minutes, allowing the sugar to dissolve completely. Once the mixture starts bubbling, lower the heat and let it simmer for another 2-3 minutes, stirring frequently. Remove the pan from heat and stir in the vanilla extract for added flavor.
Step 3: Pour the caramel over the pretzels
Carefully pour the caramel sauce over the pretzel pieces in the baking pan. Make sure the caramel is evenly distributed, gently tapping the pan on the counter to help the caramel settle into all the nooks and crannies of the pretzels. Allow the caramel to cool for a few minutes to set slightly before proceeding.
Step 4: Melt the chocolate
In a separate microwave-safe bowl, melt the semisweet chocolate chips in 30-second intervals, stirring after each interval until smooth and completely melted. Alternatively, you can melt the chocolate using a double boiler on the stovetop. If you prefer a thinner consistency for the chocolate, you can add a teaspoon of vegetable oil or shortening to make it more pourable.
Step 5: Top the bars with chocolate
Once the caramel has set slightly, pour the melted chocolate over the caramel and pretzel layer. Spread the chocolate evenly using a spatula to cover the entire surface. If you like, sprinkle chopped nuts such as pecans, almonds, or walnuts on top for an extra crunch and flavor boost.
Step 6: Chill the bars
Refrigerate the bars for at least 2 hours or until the chocolate is completely set and hardened. The longer they chill, the firmer and more cohesive the bars will be. Once the bars are fully set, remove them from the refrigerator and cut them into squares or rectangles.