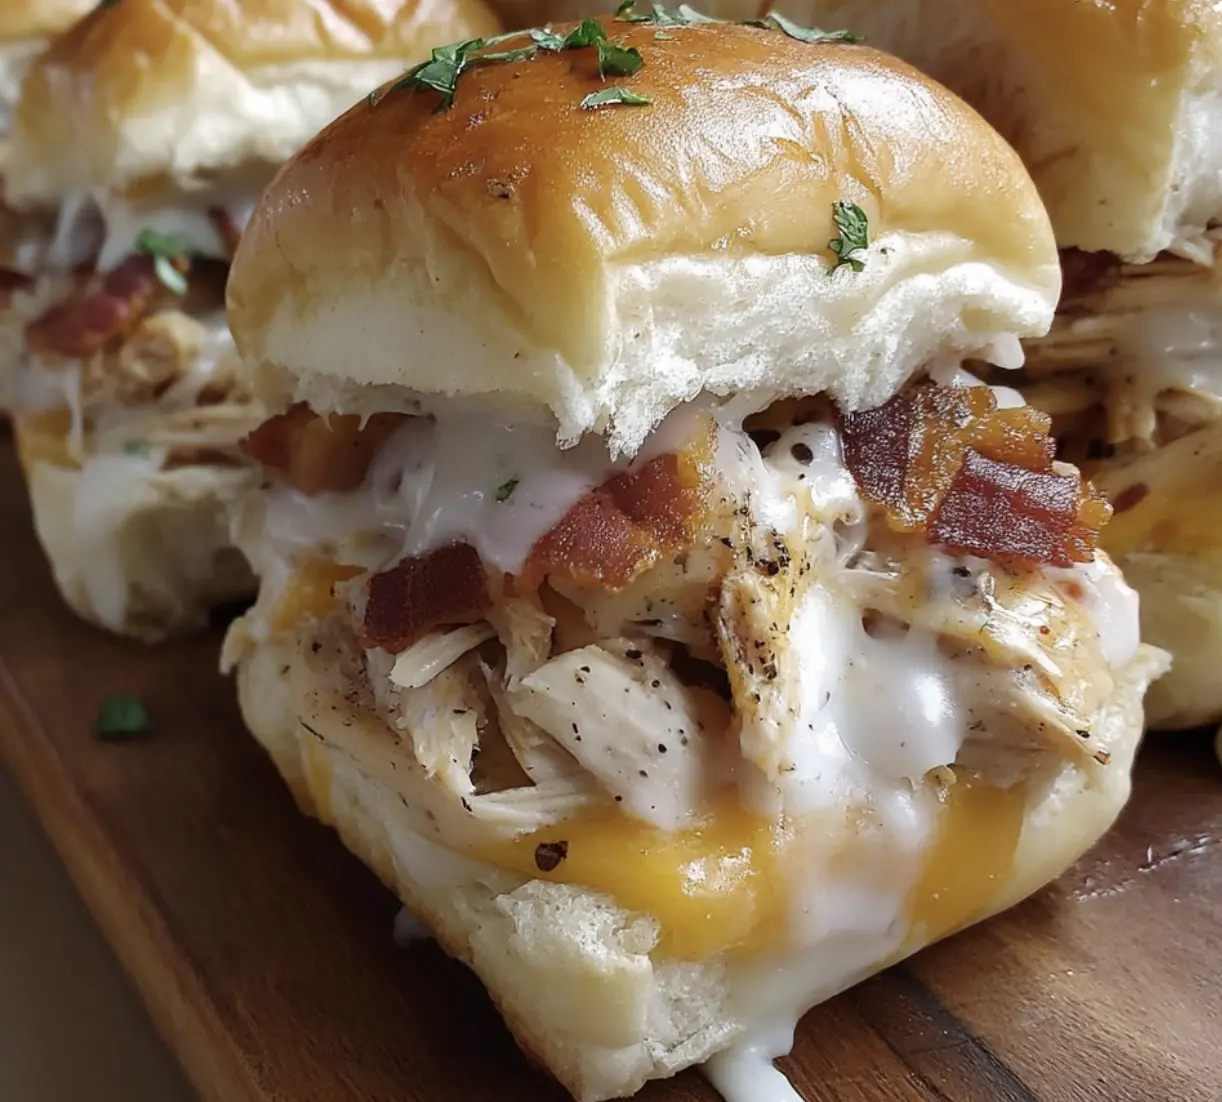
If there’s one recipe that checks all the boxes for flavor, convenience, and universal appeal, it’s Chicken Bacon Ranch Sliders. These savory mini sandwiches, baked to golden perfection on sweet Hawaiian rolls, are packed with tender shredded chicken, creamy ranch dressing, crispy bacon, melted cheddar, and a buttery garlic topping. Whether you’re planning a game day feast, a family dinner, or looking for the ultimate party appetizer, this recipe is a winner.
In this blog post, we’ll explore why these sliders are so loved, how to make them step-by-step, expert tips for customization, storage tips, and more. By the end, you’ll be ready to whip up a batch of these irresistible sliders for your next gathering or even just a cozy night in.
Why You’ll Love These Chicken Bacon Ranch Sliders
1. They’re Incredibly Easy to Make
You only need 10 minutes of prep and 15 minutes in the oven—making this a fast yet satisfying recipe perfect for busy weeknights.
2. A Flavor Combination That Never Fails
Chicken, bacon, and ranch is a classic trio. Add in melty cheddar cheese and Hawaiian rolls, and you’ve got a crave-worthy meal that’s sweet, savory, and creamy all in one bite.
3. Perfect for Any Occasion
These sliders are great for:
-
Potlucks and parties
-
Game day spreads
-
Family dinners
-
Meal prepping for the week
4. Customizable
You can easily adapt this recipe with different cheeses, sauces, or even swap the protein for turkey or ham.
Ingredients You’ll Need
Let’s break down what goes into these flavorful sliders:
For the Filling:
-
4 cups cooked, shredded chicken – Rotisserie chicken works wonderfully here for convenience.
-
1 cup ranch dressing – Provides that creamy, herby base.
-
1/2 cup bacon, cooked and crumbled – Adds crunch and a smoky flavor.
-
3 tablespoons Parmesan cheese – For added depth and a little salty tang.
For Assembly:
-
15 Hawaiian sweet rolls – Soft, slightly sweet rolls that pair perfectly with the savory filling.
-
2 cups shredded cheddar cheese – Melts beautifully for that gooey, cheesy texture.
-
1/4 cup butter, melted – Brushed on top for richness.
-
1 teaspoon garlic powder – Infused in the butter for irresistible flavor.
How to Make Chicken Bacon Ranch Sliders (Step-by-Step)
Step 1: Preheat Your Oven
Set your oven to 350°F (175°C) and lightly grease a 9×13-inch baking dish.
Step 2: Prepare the Filling
In a large bowl, combine:
-
4 cups cooked, shredded chicken
-
1 cup ranch dressing
-
1/2 cup crumbled cooked bacon
-
3 tablespoons grated Parmesan cheese
Mix until everything is well-coated and evenly distributed.
Step 3: Assemble the Sliders
-
Slice the Hawaiian rolls in half horizontally, keeping them intact as a single sheet.
-
Place the bottom half in your prepared baking dish.
-
Evenly spread the chicken mixture over the bottom layer.
-
Sprinkle the shredded cheddar cheese on top of the chicken mixture.
-
Add the top half of the rolls to complete the sandwiches.
Step 4: Add the Topping
In a small bowl, mix:
-
1/4 cup melted butter
-
1 teaspoon garlic powder
Brush this garlic butter generously over the tops of the rolls for added flavor and a golden finish.
Step 5: Bake to Perfection
-
Cover the dish with aluminum foil and bake for 15 minutes, or until the cheese is fully melted and the sliders are heated through.
-
Remove the foil and bake for an additional 3-5 minutes for a slightly crispy top (optional).
Step 6: Serve Warm
Once out of the oven, let the sliders cool slightly, then use a sharp knife to slice and serve.

Pro Tips for the Best Sliders
-
Use Fresh Rolls: Hawaiian rolls are soft and fluffy—perfect for soaking up flavors without getting soggy.
-
Shred Chicken Finely: This helps it distribute more evenly and makes for easier bites.
-
Add a Layer of Cheese on Both Sides: If you’re a cheese lover, add a little cheese under the chicken mixture too.
-
Make Ahead: Assemble ahead and refrigerate. Bake right before serving to save time during your event.
Variations and Substitutions
Cheese Swaps
Try using:
-
Monterey Jack for a creamier melt
-
Pepper Jack for a spicy kick
-
Swiss for a nutty twist
Add-Ins
-
Jalapeños – For some heat
-
Caramelized onions – For sweetness and depth
-
Sliced tomatoes – For freshness and acidity
Different Sauces
Not a fan of ranch? Try:
-
Caesar dressing
-
Buffalo sauce
-
Honey mustard
What to Serve with Chicken Bacon Ranch Sliders
These sliders are hearty enough to serve on their own, but here are a few great pairings:
-
Crispy potato wedges
-
Coleslaw
-
Macaroni salad
-
Pickles or pickled veggies
-
Fruit salad for a lighter touch
Storage and Reheating Tips
Storing Leftovers
Place cooled sliders in an airtight container and store in the refrigerator for up to 3 days.
Reheating
Reheat in the oven at 325°F until warmed through (about 10-15 minutes), or microwave individual sliders for 30-60 seconds.
Freezing
You can freeze the assembled, unbaked sliders:
-
Wrap tightly in foil and freeze for up to 1 month.
-
Bake straight from frozen at 350°F for 30-35 minutes, or until heated through.
Frequently Asked Questions
Can I make these sliders ahead of time?
Yes! You can assemble them a few hours in advance and keep them covered in the refrigerator. Just bake when ready to serve.
Are they good served cold?
They’re best served warm when the cheese is melty, but they’re still tasty at room temperature, making them great for potlucks.
Can I use turkey instead of chicken?
Absolutely. Leftover turkey works well, especially after the holidays.
What’s the best way to cook bacon for this recipe?
Bake it in the oven at 400°F on a foil-lined baking sheet for 15-18 minutes for even, crispy bacon with minimal mess.
Why This Recipe Works
Chicken Bacon Ranch Sliders strike the perfect balance between creamy, cheesy, savory, and sweet. The ranch dressing keeps the chicken moist, while bacon brings texture and saltiness. Hawaiian rolls offer a tender contrast and a subtle hint of sweetness that ties everything together.
Whether you’re new to cooking or a seasoned kitchen pro, this recipe is nearly foolproof and always a hit.
Final Thoughts
If you’re looking for an easy, cheesy, and downright comforting dish to serve for your next event—or just dinner tonight—look no further than these Chicken Bacon Ranch Sliders. They’re fast, flavorful, and guaranteed to please even the pickiest of eaters.
Print
Chicken Bacon Ranch Sliders: The Ultimate Comfort Food Sandwich
Description
These Chicken Bacon Ranch Sliders are the ultimate party food: juicy shredded chicken, smoky bacon, creamy ranch, and melty cheddar all nestled inside sweet Hawaiian rolls, brushed with buttery garlic on top. Perfect for game day, potlucks, or an easy weeknight dinner. They’re irresistibly gooey, cheesy, and packed with savory flavor!
Ingredients
4 cups chicken, cooked and shredded
1 cup Ranch dressing
1/2 cup bacon, cooked and crumbled
3 tablespoons Parmesan cheese
15 Hawaiian sweet rolls
2 cups cheddar cheese, shredded
1/4 cup butter, melted
1 teaspoon garlic powder
Instructions
Preheat the oven to 350°F (175°C).
Grease a 9×13 baking pan and place the bottom half of the sliced Hawaiian rolls inside.
In a mixing bowl, combine the chicken, Ranch dressing, bacon, and Parmesan cheese until well mixed.
Spread the chicken mixture evenly over the bottom half of the rolls in the baking pan.
Sprinkle shredded cheddar cheese over the chicken mixture.
Place the top half of the rolls on top to form sandwiches.
In a small bowl, mix the melted butter with garlic powder.
Brush the garlic butter over the top of the rolls.
Cover the pan with aluminum foil and bake in the preheated oven for 15 minutes, or until the cheese is melted and the sliders are heated through.
Remove foil and serve warm.
Notes
-
Make-Ahead Tip: Prepare the filling in advance and store it in the fridge—assemble and bake when ready.
-
Add a Kick: Mix in a few sliced jalapeños or a dash of hot sauce to the chicken mixture for a spicy twist.
-
Cheese Swap: Try mozzarella, Monterey Jack, or pepper jack for melty variety.
-
Crispier Tops: For a golden, crisp finish, remove the foil and broil for the last 1-2 minutes.
-
Freezer Friendly: These sliders can be assembled, wrapped, and frozen. Just thaw and bake when you need a quick, delicious meal!

