

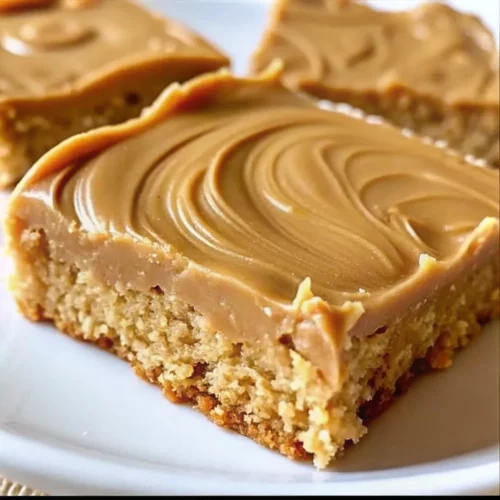
Remember those simpler times, the comforting aroma of the school cafeteria, and the pure, simple joy of finding that specific treat on your tray? Let’s take a delicious trip down memory lane, right back to the simple pleasure of a soft, chewy peanut butter bar smothered in thick, sweet frosting. These Peanut Butter Lunch Lady Cookie Bars are a delightful recreation of that beloved classic, designed to bring that comforting nostalgia straight to your kitchen.
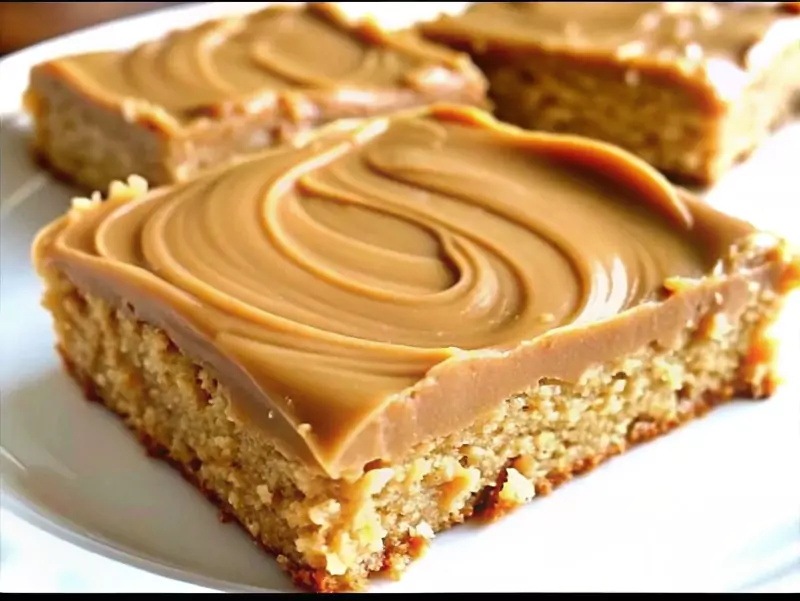
Imagine biting into a perfectly soft, dense, and satisfyingly chewy bar, absolutely packed with rich peanut butter flavor. Now, picture that topped with an equally peanut-buttery, dreamily creamy frosting that melts slightly into the warm bar beneath. Sound amazing? It gets better! These bars are incredibly easy to make – the base comes together quickly and bakes right in one pan, making them perfect for bake sales, potlucks, satisfying after-school snack attacks, or truly anytime a comforting, crowd-pleasing treat is exactly what’s needed. Get ready for a foolproof recipe that delivers that authentic Peanut Butter Lunch Lady Cookie Bars experience you’ve been craving!
Why You’ll Fall in Love with These Bars:
-
Pure Nostalgia: Tastes just like the beloved school cafeteria classic!
-
Incredibly Easy: Simple mixing and baked in one pan.
-
Peanut Butter Perfection: Loaded with peanut butter in both the bars and the frosting.
-
Perfectly Chewy Texture: Soft, dense, and satisfyingly chewy.
-
Crowd-Pleasing: Always a hit with kids and adults alike.
-
Simple Frosting: Unique, easy saucepan frosting poured over warm bars.
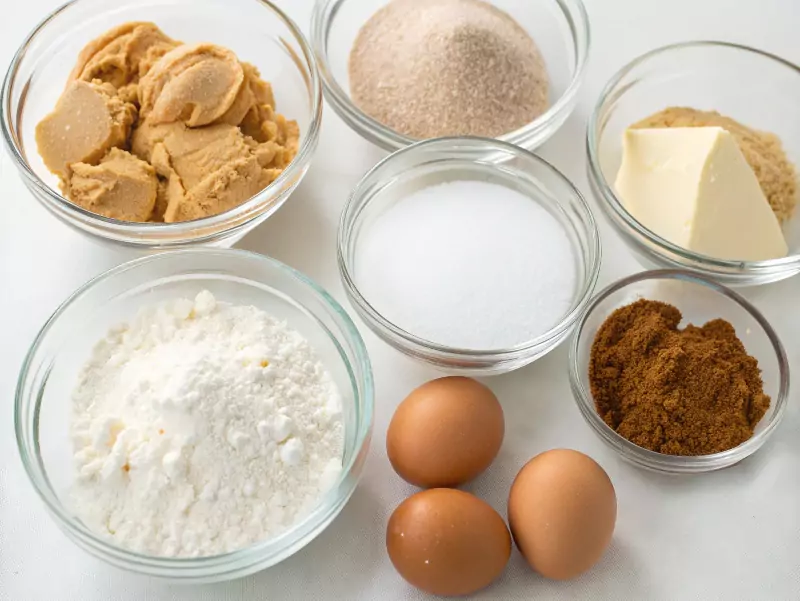
Ingredients:
-
For the Peanut Butter Lunch Lady Cookie Bars :
-
1 cup (2 sticks / 226g) Unsalted Butter, softened to room temperature
-
1 cup (250-260g) Creamy Peanut Butter (standard commercial style like Jif/Skippy recommended; avoid natural separation style)
-
1 cup (200g) Granulated Sugar
-
1 cup (213g) Packed Light Brown Sugar (ensure it’s soft and packed)
-
2 Large Eggs, preferably at room temperature
-
1 teaspoon Vanilla Extract
-
2 cups (240-250g) All-Purpose Flour (spooned and leveled recommended)
-
1 teaspoon Baking Soda
-
1/4 teaspoon Salt
-
-
For the Peanut Butter Frosting:
-
1/2 cup (125-130g) Creamy Peanut Butter (standard commercial style)
-
1/4 cup (1/2 stick / 57g) Unsalted Butter, softened slightly
-
1/4 cup (60ml) Milk (Whole or 2% recommended)
-
2 cups (approx. 240g) Powdered Sugar (Confectioners’ Sugar), sifted if prone to lumps
-
1/2 teaspoon Vanilla Extract
-
Equipment Needed:
-
Large Mixing Bowl (Stand mixer or Hand mixer recommended)
-
Separate Medium Bowl (for dry ingredients)
-
9×13 inch Baking Pan
-
Parchment Paper (optional, but highly recommended)
-
Small Saucepan (for frosting)
-
Whisk
-
Spatula (for spreading batter and frosting)
Preparation:
-
Step 1: Preheat Oven & Prep Pan: Preheat your oven to 350°F (175°C). Generously grease a 9×13 inch baking pan OR (highly recommended for easy removal) line the pan with parchment paper, leaving a slight overhang on two opposite sides to act as handles. Set aside.
-
Step 2: Cream Wet Ingredients & Sugars: In a large mixing bowl using a stand mixer with the paddle attachment or a hand mixer, combine the softened unsalted butter, 1 cup of creamy peanut butter, granulated sugar, and packed light brown sugar. Beat on medium speed for 2-3 minutes until the mixture is well combined, smooth, and appears lighter in color and texture.
-
Step 3: Add Eggs & Vanilla: Add the eggs one at a time, beating well after each addition until fully incorporated. Scrape down the sides of the bowl as needed. Beat in the 1 teaspoon of vanilla extract.
-
Step 4: Combine Dry Ingredients: In a separate medium bowl, whisk together the all-purpose flour, baking soda, and salt. This ensures the leavening and salt are evenly distributed.
-
Step 5: Combine Wet and Dry: Gradually add the flour mixture to the wet ingredients in the large bowl. Mix on low speed (or stir with a sturdy spoon) just until the flour is incorporated and no dry streaks remain. Do not overmix! Overmixing can lead to tough bars. The batter will be thick.
-
Step 6: Spread Batter in Pan: Scrape the thick peanut butter cookie batter into the prepared 9×13 inch pan. Using an offset spatula or the back of a spoon (lightly greased if sticking), spread the batter evenly across the bottom of the pan, pushing it into the corners.
-
Step 7: Bake the Bars: Place the pan in the center of the preheated oven. Bake for 18 to 23 minutes. The bars are done when the edges are set and lightly golden brown, and the center no longer looks wet or doughy. A toothpick inserted into the center should come out with moist crumbs attached, but no wet batter. Be careful not to overbake to ensure a chewy texture.
-
Step 8: Start Frosting (While Bars Bake/Finish): Towards the end of the bars’ baking time, begin preparing the frosting. In a small saucepan, combine the 1/2 cup creamy peanut butter and the 1/4 cup unsalted butter. Place over low to medium-low heat.
-
Step 9: Melt Butter & Peanut Butter: Heat gently, stirring frequently, just until the butter and peanut butter are melted and smooth. Do not let the mixture boil or scorch.
-
Step 10: Finish Frosting: Remove the saucepan from the heat immediately once melted. Whisk in the 1/4 cup milk and the 1/2 teaspoon vanilla extract until combined. Gradually whisk in the powdered sugar, about half a cup at a time, whisking vigorously after each addition until the frosting is smooth and free of lumps. If it seems too thick, add another teaspoon or two of milk; if too thin, add a bit more powdered sugar. (Sifting powdered sugar beforehand helps ensure smoothness).
-
Step 11: Frost Hot Bars: As soon as you remove the bars from the oven, immediately pour the warm peanut butter frosting evenly over the surface of the hot bars.
-
Step 12: Spread Frosting: Working quickly while the frosting is warm and fluid, use an offset spatula or the back of a spoon to spread the frosting evenly across the entire surface of the bars, reaching the edges. The heat from the bars helps the frosting spread easily.
-
Step 13: COOL COMPLETELY!: This step is crucial! Place the pan on a wire cooling rack and let the bars cool completely at room temperature before attempting to slice them. This will likely take 2-3 hours. Cooling allows the frosting to set properly and the bars to firm up, ensuring clean slices. Do not rush this step.
Variations of this Peanut Butter Lunch Lady Cookie Bars :
-
Crunchy Peanut Butter: Substitute crunchy peanut butter for creamy in the bars (and/or frosting) for added texture.
-
Chocolate Chip Addition: Fold 1 cup of semi-sweet or milk chocolate chips into the bar batter before spreading in the pan.
-
Nutty Topping: Sprinkle 1/2 cup of chopped roasted peanuts or other nuts (like pecans or walnuts) over the frosting immediately after spreading it, before it sets.
-
Chocolate Drizzle: Once the frosting is set, drizzle melted chocolate over the top.
-
Reese’s Pieces: Fold Reese’s Pieces candies into the batter or sprinkle mini ones over the frosting.
-
Flaky Salt: Sprinkle a little flaky sea salt over the frosting just after spreading for a sweet and salty contrast.
Cooking Notes:
-
Peanut Butter Choice: Use standard processed creamy peanut butter (like Jif, Skippy, Peter Pan). Natural peanut butter behaves differently due to oil separation and may yield different results in texture for both bars and frosting.
-
Don’t Overbake: For the classic chewy texture, err on the side of slightly underbaking rather than overbaking. The bars will continue to set as they cool.
-
Warm Frosting on Hot Bars: This technique is key for this style. The heat allows the simple frosting to spread easily and creates that classic slightly melded texture. Don’t let the bars cool before frosting.
-
Frosting Consistency: The frosting should be smooth and easily pourable but not watery thin. Adjust slightly with milk or powdered sugar if needed immediately after removing from heat.
-
Parchment Paper Power: Using parchment paper with an overhang makes lifting the entire cooled slab out of the pan for easy, neat slicing a breeze.
-
Measuring Flour: Spoon flour into the measuring cup and level it off for accuracy. Scooping compacts flour, potentially leading to dry bars.
Serving Suggestions:
-
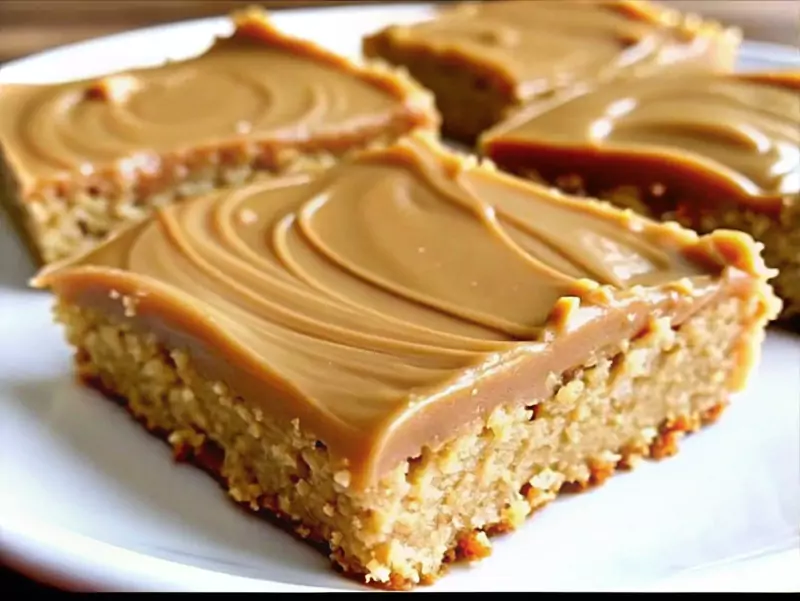
Classic Square: Cut into squares (16, 20, or 24 depending on desired size).
-
With Milk: The absolute classic pairing – a tall glass of cold milk!
-
After School Snack: Perfect for kids (and adults!) needing a pick-me-up.
-
Potlucks & Bake Sales: These travel well and are always popular crowd-pleasers.
-
Dessert Platter: A great addition to a dessert table or cookie platter.
Tips for Success fro this Peanut Butter Lunch Lady Cookie Bars :
-
Room Temperature Ingredients: Use softened butter and room temperature eggs for better incorporation in the batter.
-
Don’t Overmix: Mix the flour in just until combined for tender, chewy bars.
-
Spread Batter Evenly: Try to get the batter layer consistent for even baking.
-
Cooling is Mandatory: Resist the urge to slice early! Complete cooling (2-3 hours) is essential for the frosting to set and to get clean cuts.
-
Slicing: Use a large sharp knife. For extra clean cuts, run the knife under hot water and wipe it dry between slices.
-
Storage: Store cooled and sliced bars in an airtight container at room temperature for up to 3-4 days. Layer with parchment paper to prevent sticking if stacking.
Prep Time: Approximately 15-20 minutes
Cooking Time: 18-23 minutes
Total Time: Approximately 35-45 minutes + Crucial Cooling Time (2-3 hours)
Nutritional Information (Estimated):
-
Calories: ~320-380 kcal
-
Protein: ~6-7 g
-
Sodium: ~150-200 mg
-
Sugar: ~30-35 g
-
Fat: ~20-25 g
-
Saturated Fat: ~9-11 g
-
Unsaturated Fat: ~10-12 g
-
Trans Fat: ~0.5 g
-
Carbohydrates: ~35-40 g
-
Fiber: ~1-2 g
-
Cholesterol: ~45-55 mg
(Disclaimer: Nutritional information is an estimate only and varies based on specific ingredients, brands used, final bar size, etc.)
FAQs (Frequently Asked Questions):
-
Q1: Can I use natural peanut butter?
-
A: It’s not recommended for this specific recipe. Standard processed peanut butter provides the expected texture and stability for both the bars and the classic frosting. Natural PB might make the bars drier/crumblier and the frosting oily or separated.
-
-
Q2: My frosting seems too thick/thin. How do I fix it?
-
A: Adjust immediately after removing from heat. Whisk in another teaspoon or two of milk if too thick. Whisk in another tablespoon or two of powdered sugar if too thin. Work quickly before it cools too much.
-
-
Q3: Can I make these ahead of time?
-
A: Yes, they store well. Bake and frost, cool completely, slice, and store in an airtight container at room temperature for several days.
-
-
Q4: Can I halve this recipe?
-
A: Yes, you can halve the ingredients and bake in an 8×8 inch square pan. Start checking for doneness around 15-18 minutes.
-
-
Q5: Can I freeze these peanut butter bars?
-
A: Yes. Cool completely, slice, then place in a single layer on a baking sheet to freeze solid. Transfer to a freezer-safe container or bag, layering with parchment paper. Freeze for up to 2-3 months. Thaw at room temperature.
-
-
Q6: Why are they called “Lunch Lady” bars?
-
A: This style of simple, sheet-pan baked bar with a straightforward frosting is reminiscent of the comforting, no-frills desserts often served in American school cafeterias, lovingly made by the “lunch ladies.”
-
Take a delicious trip down memory lane with these incredible Peanut Butter Lunch Lady Cookie Bars! They perfectly capture that nostalgic blend of chewy peanut butter goodness and sweet, creamy frosting that defines a beloved classic. Simple to make, impossible to resist, and guaranteed to bring smiles, this recipe is your ticket to pure comfort food bliss. Bake a batch today and share the simple joy – just don’t forget the milk!)
Peanut Butter Lunch Lady Cookie Bars
- Total Time: 44 minute
- Yield: 16-24 bars
- Diet: Vegetarian
Description
A taste of nostalgia! These easy Peanut Butter Lunch Lady Cookie Bars feature a super chewy peanut butter base baked in one pan and topped with a simple, creamy peanut butter frosting poured over while warm. A crowd-pleasing classic perfect for snacks, potlucks, and bake sales.
Ingredients
-
For the Bars:
-
1 cup (2 sticks) Unsalted Butter, softened
-
1 cup Creamy Peanut Butter (standard commercial type)
-
1 cup Granulated Sugar
-
1 cup Packed Light Brown Sugar
-
2 Large Eggs
-
1 tsp Vanilla Extract
-
2 cups All-Purpose Flour
-
1 tsp Baking Soda
-
1/4 tsp Salt
-
-
For the Frosting:
-
1/2 cup Creamy Peanut Butter (standard commercial type)
-
1/4 cup Unsalted Butter
-
1/4 cup Milk
-
2 cups Powdered Sugar
-
1/2 tsp Vanilla Extract
-
Instructions
-
paper with overhang.
-
Cream: In a large bowl, beat softened butter, 1 cup peanut butter, granulated sugar, and brown sugar until smooth (2-3 mins).
-
Add Eggs/Vanilla: Beat in eggs one at a time, then vanilla.
-
Combine Dry: Whisk flour, baking soda, and salt in a separate bowl.
-
Make Batter: Gradually add dry ingredients to wet, mixing on low just until combined. Do not overmix. Batter will be thick.
-
Spread & Bake: Spread batter evenly in prepared pan. Bake 18-23 minutes, until edges are lightly golden and a toothpick has moist crumbs. Do not overbake.
-
Start Frosting: Near end of baking, combine 1/2 cup peanut butter and 1/4 cup butter in a small saucepan over low heat. Stir until just melted and smooth.
-
Finish Frosting: Remove from heat. Whisk in milk and vanilla. Gradually whisk in powdered sugar until smooth.
-
Frost Hot Bars: Immediately pour warm frosting over hot bars just out of the oven. Spread evenly.
-
COOL COMPLETELY: Let bars cool entirely in pan on a wire rack (2-3 hours) before slicing. This is essential for frosting to set.
Notes
Use standard creamy peanut butter (like Jif/Skippy), not natural style.
Do not overmix batter or overbake bars for best chewy texture.
Frosting while bars are hot is key for this recipe style.
Must cool completely (2-3 hours) before slicing for clean cuts and set frosting.
Use parchment paper overhang for easy removal from pan.
Store cooled bars airtight at room temperature up to 4 days.
- Prep Time: 15-20 minutes
- Cook Time: 18-23 minutes
- Category: Dessert, Bars, Cookies
- Method: Baking
- Cuisine: American
Nutrition
- Serving Size: 1 bar (1/16th of pan)
- Calories: ~350 kcal
- Sugar: ~32 g
- Sodium: ~180 mg
- Fat: ~22 g
- Saturated Fat: ~10 g
- Unsaturated Fat: ~11 g
- Trans Fat: ~0.5 g
- Carbohydrates: ~38 g
- Fiber: ~1.5 g
- Protein: ~6.5 g
- Cholesterol: ~50 mg
Keywords: Peanut Butter Lunch Lady Cookie Bars, lunch lady peanut butter bars, easy peanut butter bars, peanut butter sheet cake bars, frosted peanut butter bars, school cafeteria recipe, 9x13 dessert.